Windage specification
Windage works just the same as elevation. Knob clicks or reticle features can be used. The big
difference is that the amount of wind hold off is much less than the maximum elevation required
for the cartridge's maximum range. A typical 308 load might have 8 MOA deflection with a 20mph
cross-wind at 800 yards, while it needs about 18 MOA of elevation at that distance. This means that
windage travel is typically not an issue.
Because wind changes can be very dynamic, using the reticle for windage hold-off can be more
effective than dialing wind. For example, by the time you notice the wind and dial a correction,
it may have changed already. Using reticle windage hold-off can be immediate.
Lead specification
Again, lead works basically the same as windage.
MIL vs. MOA
In principle, either system can be used. If you're thinking about or communicating elevation
values (for example looking at data and then dialing or holding off), a typical elevation value in
MOA for 308 looks like "11.25" which is four digits, but the same mil-based would be just "3.2" or
two digits. (In fact you can go out to over 1000 yards before needing more than two digits of
elevation in mils.) This is less information to process.

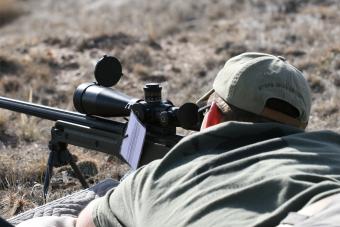
 The 5-25x56mm S&B PMII has a parallax and focus adjustment knob on the left-hand side. The PMII is set up with
a P4-Fine mil-hash reticle and 0.1-mil click knobs.
Parallax Adjustment
There are two types of parallax adjustment. The first is an adjustable objective, in which the
objective bell itself rotates to adjust parallax. The second is a rotating knob typically on the
left side of the scope, opposite the windage knob.
The adjustable objective is optically simpler, meaning fewer lenses and more clarity and
brightness, but the shooter must reach forward to the objective to adjust it. The rotating knob
adjustment is more convenient since it's located closer, near the rest of the turrets, however,
more lenses are involved which can reduce clarity and brightness.
In either case, some parallax adjustment knobs or objectives are marked for range so the shooter
can dial it based on the target distance. Others are not marked with distances, and it's up to
the shooter to determine visually when the image is in focus and parallax-free.
To determine if parallax exists at a certain distance, the shooter aims at an object at that
distance, then moves his head slightly side to side and up and down without moving the rifle. If
the reticle aiming point stays "on" the object, then it is parallax-free. If the reticle aiming
point moves with regard to the object, then some parallax error is present.
Reticle Illumination

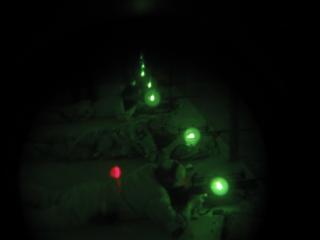
 During a night shoot, shooters are visible only by their cylume chamber flags.
In some low-light conditions, it is difficult or impossible to see a black reticle on a dark
target. Most tactical scopes are available with the option of an illuminated reticle.
Mechanically, this consists of some type of external switch or brightness adjustment control, a
battery, and a light source such as an LED (light emitting diode) inside the scope actually
providing the light to the reticle.
Some reticles are fully illuminated, but some reticles only illuminate their center portion. A
fully lit reticle can be too "busy" visually, while a partially or center lit reticle might not
illuminate all the reticle features. Brightness adjustment is critical. If the reticle is
too dim, it might as well not be illuminated at all. If the reticle is too bright, it will wash
out and obscure the target.
There are several methods to turn on or adjust the brightness. Leupold scopes have an
on/off/brightness turret at the 10:30'o'clock position on the ocular housing, just to the rear of
the power adjustment ring. This is offset from the elevation adjustment knob, but still obscures
it somewhat. Nightforce scopes have a simple on/off switch activated by pulling put the cap of
the parallax adjustment knob. Schmidt & Bender have an auxiliary knob on the side for on/off and
brightness adjustment. US Optics scopes with illumination similarly have a auxiliary knob
somewhere on the turret housing of the scope, location depending on other scope features.
Illuminated reticles, when turned on, are visible from the front of the weapon, through the
objective lens as a red/orange light. The frontal visibility depends on the angle of
observation, the intensity of the reticle, and scope design. If it is critical to not be
observed from the target area, then reticle illumination must not be used.

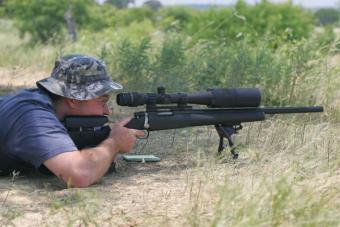
A US Optics SN-3 with a 58mm objective lens. Photo by Frankie Icenogle used with permission.
Brightness, Magnification, and Objective Size
Most modern tactical scopes will have similar image brightness during the day, but differences at
twilight and low or no-light can be dramatic. There are three main factors which affect low-light
brightness: lens quality, magnification, and objective lens diameter.
The easiest way to increase brightness is to dial down the magnification on adjustable scopes.
There is an inverse relationship between magnification and image brightness. This is another good
reason to choose an adjustable magnification scope.
The second two factors affecting brightness are characteristics of the scope itself. Given two
scopes with the same lens quality, the one with the larger objective lens will be brighter simply
because it can focus more incoming light from the target area through the scope's lenses.
Finally, lens and lens coating quality is critical to image brightness. Higher quality lenses and
coatings will pass through more light and less brightness will be lost through the scope itself.
There is a trade-off to be made between objective size and mechanical considerations. A scope
with a 80mm objective will gather 4x more light than a 40mm objective, but it will be much heavier
and will require extremely high mounts to clear the objective bell over the barrel. Mechanical
considerations favor the smaller objective, and a lower sight over bore distance is preferable
since it reduces the mechanical offset.
|