Zeroing Your Rifle
Zeroing simply means to set the point of impact at the point of aim at a certain distance. This
distance, called the "primary zero", is the where the bullet will impact where the cross-hairs are
pointed, when the elevation and windage knobs are zeroed out and have no adjustments applied.
I recommend using a 100-yard zero instead of a longer-distance zero for several reasons. First, any
wind that is present will have a very small affect on the zero. Second, if you are "off" in
distance by up to 10 or 15 yards, the effect on your zero will be minimal. For example, if you're
actually shooting at 90 yards or 110 yards instead of 100 yards exactly, the difference in point of
impact will be less than a tenth of a minute. Lastly, 100 yards is so short a distance that if you
travel up or down in altitude, or if the temperature changes dramatically, your primary zero will
not be affected. Longer-distance zeros such as 500 yards will become invalid with large
environmental changes such as those, because the air density will affect the point of impact. When
running a 100-yard zero, the primary zero stays valid, and you just need to adjust your down-range
dialed trajectory.

 Open land for shooting can be hard to find. Public lands are often the only place to shoot beyond
200 yards.
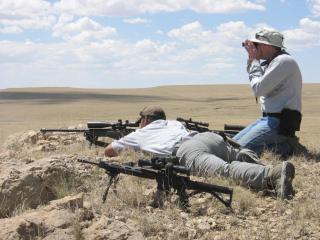
Zeroing should be done either from the most stable position possible, such as off of sandbags on a
bench, or from the most stable position you use in the field, such as shooting off a bipod or
rucksack. Shoot at least three rounds into a group before changing the point of impact using the
knobs. When the rounds are all going right into your point of aim (the center bullseye, for
example), then loosen the knob caps and zero them out, and retighten. Now you can dial to longer
distances using the data from your dope card.
Finding a Range
In many parts of the country, finding a rifle range longer than 200 yards is difficult. Even with
an established range, you are normally limited to shooting from the defined "bench" shooting area,
giving you essentially one shoot position on a known distance (KD) range. One way to get access to
good field-style shooting is to attend a national-level match of that type. Examples include
Colorado Multi-Gun's Practical Rifle Team Challenge, and the Blue Steel Ranch Steel
Safari.
Unless you have access to thousands of acres of private land where you can shoot, the best bet is to
find public lands where target shooting is legal. For example, in most National Forests, shooting
is legal as long as you follow some simple rules and clean up after yourself.

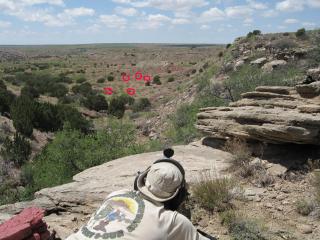
 Locating targets can be extremely difficult and is an acquired skill. Five targets here are circled
in red.
Targets and Placement
Obviously the first priority needs to be safety -- be sure of what is behind your target, and that
there is enough empty to ensure safety.
I recommend shooting at armor steel (AR400 or AR500) steel plates, hung from conveyor belt strap.
If they are one a metal stand, make sure some "play" is available. This will make the steel "ring"
to indicate a hit, and help to reduce ricochets.
For practice, I recommend placing hanging steel plates in front of a hillside of rock or dry dirt.
This will make it easier to spot misses, since the dust will be readily visible and its location can
be easily determined relative to the target. If the target is on the top of a hill or a totally
flat location, or in front of bushes or trees, it can be very difficult or impossible to spot
misses. (When setting up a match, do not follow those guidelines-- don't want to make it too
easy for the shooters!)
Place targets at arbitrary and irregular distances. This makes the shooters actually range the
targets and not just guess knowing that you set targets every 50 yards, and do some interpolation of
their data card compared to the actual distance.
Packing Up
Here's a checklist of things you should bring:
- Rifle with solid 100 yard zero.
- Ammunition (the same ammo you zeroed the rifle with)
- Data card for the rifle, ammunition, and current environmental conditions.
- Rear bag.
- Laser range-finder.
- Optional: binoculars for spotting.
- Eye and ear protection.
Put everything in a small-medium sized backpack, and hike to the first shooting position.
|