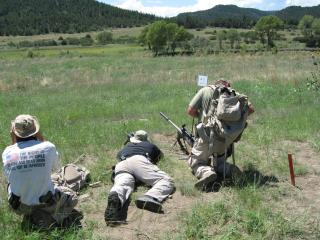
 The team's carbine shooter has already begun engaging his designated targets as the rifle shooter
continues to get ready, at the 2006 PRTC.
Arrival, Target Location, and Positioning
As you approach the first shooting location, start scanning the area for targets. Getting an idea
of where the targets are will influence your shooting position. You want to pick the most stable
position where you can engage the most number of the targets. If it's not possible to shoot them
all from one stable position, figure out which targets you can engage from the first position, and
which targets you'll have to move for. Since we are interested in first-round hits, it's better to
take a little extra time to get into more stable positions, than to shoot targets from an
unsupported position.
First, un-sling the rifle and place it on the ground. Second, remove the backpack and retrieve only
the equipment that you will need to make the shots. We're not having a picnic, just engaging a few
targets. I usually grab a magazine, the laser range-finder, and my rear bag. Get down into what
will likely be your shooting position for the first target. Pick up the laser range-finder and range
the first target.

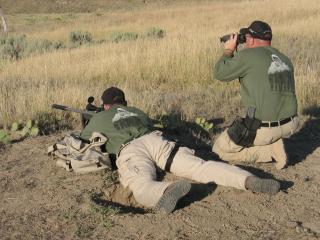
 This spotter uses a pair of the old Leica Geovids to range targets while his partner prepares to engage.
You always have the option of locating and ranging all the targets first, or ranging them as you
go. I always try to locate all the targets first, so I can determine the engagement order. I
usually then range targets as I engage them, since I do not take notes or write a range card. This
makes sense if your goal is to make one or two hits per target and then move on. If you will be at
a shooting position for a while, and engaging the targets multiple times, coming back to targets, or
waiting for emerging targets, it makes sense to write out a range card. A range card should
describe the location of each target or referential terrain feature in a terse manner, with the
object distance. Annotating the object distance with the drop value for your rifle from the dope
card is a good idea, since it removes the look-up step when you come back to that target.
Ranging
To range a target using the laser range-finder, in most conditions you will be able to put the LRF
reticle on the target, press the "range" button, and get a range value. For targets that stick up
from the ground (like a hanging plate, a popper, or silhouette) be aware that if you are off to one
side or the other, the laser might miss the target and reflect off the ground behind the target.
Depending the terrain, this can be a substantial ranging error since the range will be
over-estimated. One way to get around this problem is to range the ground or grass at the "foot" of
the target, or to range a very nearby bush, tree, or other object. Try ranging the target two or
three times to verify a consistent value.

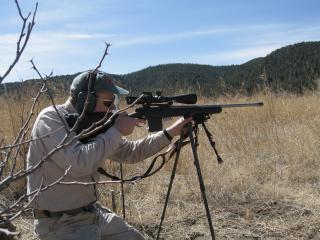
 Shooting sticks can be invaluable shooting over high grass.
If your LRF is broken, or you don't have one, or you don't have time to get to it, or for whatever
reason, then you need to "mil" the target to determine its range. One mil is 1 part height in 1000
parts distance, so 1 mil will demarcate 1 yard height at 1000 yards distance, or 18" (1/2 yard) at
500 yards. The formula is: take the object's actual height in inches, multiple by 27.8, and divide
by the number of mils it covers in the reticle. For example, if a target is 30" high and it appears
1.75 mils high in the reticle, then the distance is 30*27.8/1.75 = 476 yards.
Position
Get into a good stable shooting position. Usually, this means getting as close as
possible to shooting prone off the bipod with the rear bag in place, as comfortable as you can get,
with as little muscle tension as possible.
If prone position is not possible due to terrain and target location, get into the best position you
can using the features and equipment available. This is the time to employ your shooting sticks,
maybe sling up in your shooting sling, consider using your backpack as an additional support, or see
if you can brace up against natural rock formations or trees.
I recommend loading the rifle now. You can engage the safety or even leave the bolt open. The
purpose of loading at this point is to conserve time between making your wind call and breaking the
first shot, and to be able to "stay on" the gun and looking through the scope without having to
break position and get up to do something else. Wasting time allows changes in wind condition which
can cause misses.
|